Tuesday, April 14, 2015

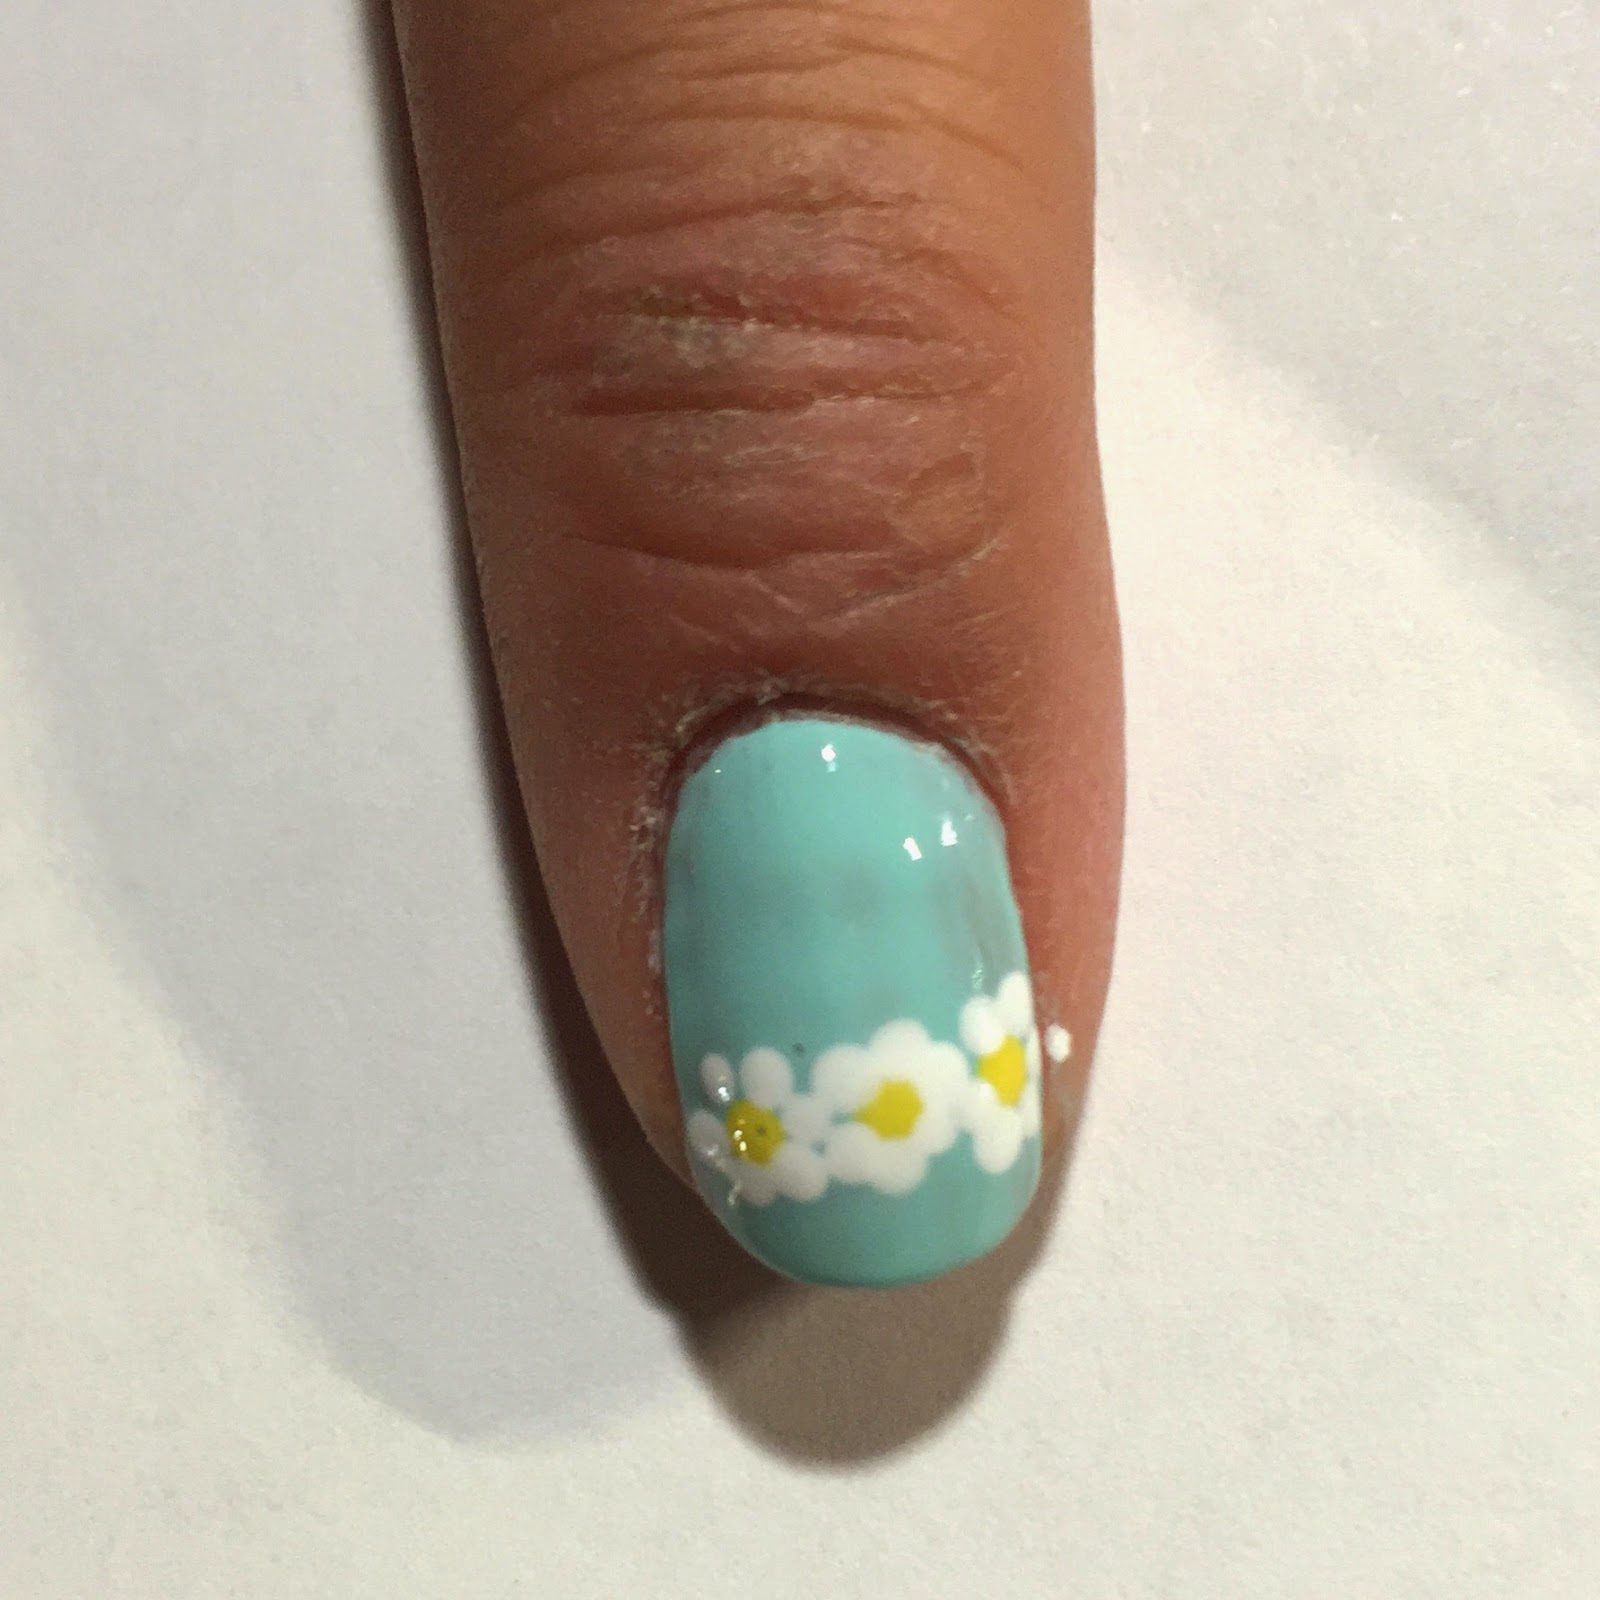
Easy Spring Floral Nail Design

Hey guys! 


I am so excited to share this design with all of you guys for two reasons. #1 being that this is a super cute and easy design that is great for the spring and summer time! It is so bright and fun! #2 is that I finally ordered the Glisten and Glow HK Girl Top Coat!! I am so incredibly excited to use this and I will be sharing my thoughts of this top coat with you all very soon! Stay tuned for that post! I have heard a bunch of great things about this top coat and so far I am loving it! 

Products Used
  • CND Stickey Base Coat
  • OPI Alpine Snow
  • Butter London Primrose Hill Picnic 
  • Zoya Sweet
  • China Glaze For Audrey
  • Revlon Gold Coin
  • HK Girl Top Coat 
  • Medium and Small Dotting Tool
  1. Lets hop right into how to recreate this design. Start off with your favorite base coat, mine being the CND Stickey. 
  2. Once that is completely dried then paint your nails with two coats of a white polish. 
  3. Then using your medium dotting tool create two darker pink five petal flowers. One on the right and one on the left towards the edge of your nail going downward. 
  4. Following step 3, use the lighter pink and place a flower in between the two darker pink ones with a small dotting tool.  
  5. After that flower is done, make the same flower as indicated in step 4 but with a blue nail polish on top the pink flowers
  6. Second to last is to place a small gold dot in the middle of all your flowers.
  7. Finally finish off with your favorite top coat and you are done! 
XOXO
Angela 

*Follow me on Instagram @nails_angela!

Sunday, April 5, 2015

Easter Nail Design

Hi guys! Happy Easter! I am here with yet another nail tutorial! 

First off, start by painting all of your nails with a mint except your ring finger. That one you will paint white. I used Essie Blossom Dandy for the mint color and OPI Alpine Snow for the white. 

After painting all of your nails a solid color, take a yellow striper on your ring finger and make two zig zag lines. This will the start of your chick hatching from an egg. 


Take your yellow striper and fill in the zig zag lines. 


Next you want to make two black dots for the eyes and add a small white dot in the middle of the black one. For the black I used a small dotting tool and for the white I used an extra small dotting tool. After that, use an orange striper and make the chick's little nose. 


On your thumb, use a yellow polish and a large dotting tool make 1/2 of a circle on the side of your nail. This begins your dainty daisy. I used Zoya's Pippa as my choice of yellow. 


Using a white striper, make the petals and fill them in.


On your pointer and pinky nails you will create a row of daisies going across your nail. Using an extra small dotting tool make three yellow dots going horizontally across your nail. Then using a white polish make the petals of the daisies with the same dotting tool. 


On your middle finger you will have the cute little bunny design. To begin, you want to take your large dotting tool and make a circle on one side of your nail. Then using the large dotting tool still, make a smaller circle on top of the big one for the bunny's body.


You can use a white striper for the bunny's ears. I chose to use a pink striper to fill in the ears and create the mouth. Take your small dotting tool and make two black dots for the eyes. 


There you have it! A super cute Easter design! 


~Hope you found this helpful and easy to follow along!~

XOXO
Angela

*Follow me on Instagram @nails_angela! 

Friday, April 3, 2015

Quatrefoil Nail Design (Picture Tutorial)

Hey guys! I am here to bring you another nail tutorial and it should be easier to follow so you are able to recreate this design! Let me know in the comment section if I should stick to these picture steps for my future tutorials. :)

Firstly paint your nails with two coats of any color you would like. I used a lavender color by Rimmel London called Sweet Lavender. I have found to really like these polishes because of the brush. The brush makes it easier to apply the polish. Also these polishes do dry in about 60 seconds which is fantastic! 


Secondly, take a medium sized dotting tool and a black polish to create a row of dots down the center of your nails. Make two more rows of dots on either side of your nail. For the black I used Rimmel London Hot Black To Go. 


After the rows of dots, use two of the dots and put two dots on each side to make sort of a cross shape. Some of the dots will be single so you can make it go off the edge. 


Using the same technique in the previous step use your base color a smaller dotting tool and place four dots in the middle of your black cross shape.


Place the lavender on all of the black cross shapes.


And you are finished! All you have to do now is put a top coat on! 

~Hopefully this is a easier way to follow how I created this quatrefoil design.~

XOXO
Angela 

*Follow me on Instagram @nails_angela! 

Tuesday, March 31, 2015

Pearl Inspired Nail Design

☺ Hello guys! I seem to finally get back into the swing of blogging! ☺
This is such an easy and quick design that anyone will be able to achieve! 

Products Used
  • CND Stickey Base Coat
  • Essie Bahama Mama
  • Revlon Gold Coin
  • Sephora by OPI Casting Call
  • Sally Hansen Diamond Shine Top Coat
  • Extra Small and Small Dotting Tools

Are you guys ready to see how easy this is? 


Well here we go! Start off with your base coat to protect against staining. Take your deep reddish purple and paint two coats of it. Next make a swooping line of dots with your small dotting tool and deep mauve pink. Two more steps and we are done! Told you it would be simple! Next take your gold and place it inside of every dot you just made with the pink. Lastly top your design off with a fast drying top coat to not smudge your beautiful design! 

XOXO 
Angela

*Follow me on Instagram @nails_angela!   

Tuesday, March 24, 2015

Dream Catcher Nail Design

Hi guys! I am finally back with another nail tutorial! 
This design was inspired by the brilliant MissJenFabulous on YouTube. I have talked about her many times. She does the most simple and beautiful nail art. 

Products Used
  • CND Stickey Base Coat
  • OPI Pulled Out a Plum
  • OPI Don't Pretzel My Buttons (OPI has such unique and adorable names!)
  • Milani Black Striper 
  • China Glaze For Audrey 
  • Sally Hansen Diamond Shine Top Coat
  • Extra Small and Small Dotting Tools
Time for the tutorial! Paint all of your nails with two coats of a purple polish except for your ring finger. That one you will paint a nice nude polish. Now the only nail you have to concentrate on is your ring finger because that is where this cute dream catcher design is placed. To begin the dream catcher you will create a "U" shape towards your cuticle area with the black striper. Next inside there you will make little triangles and it doesn't have to have much rhyme or reason to it. After that is completed, with the black striper still make three evenly spaced out lines straight down from the "U" shape. Then you will grab your extra small dotting tool and place the dots at the small point of the triangles you drew towards the cuticle. After, take your small dotting tool and put two or three dots of your blue polish on the three lines. Finally slap on a fast drying top coat and you are done with this manicure! 

XOXO
Angela

*Follow me on Instagram @nails_angela! 


Monday, February 9, 2015

Perfume Review: Marc Jacobs Daisy Eau So Fresh Delight

Hey guys! 


Today I have for you guys a different kind of review. It is on a perfume! Since it is on perfume there isn't too much to say so these will be fairly quick. 

Let's get into it. This is the Marc Jacobs Daisy Eau So Fresh Delight Perfume. I got it at Marshals for only $50! Normally I believe that this perfume is about $110. I have to say that the packaging of this perfume is absolutely perfect! It is so girly and beautiful. The scent is really lovely. It is mostly floral but has hints of sweetness. Personally I have never liked floral scents but this one is different. Something about it make me love it. This is a perfect everyday scent for more of the spring and summer since it is a lighter scent. I love that it lasts all day long so I don't have to re-apply! Overall I think that this is a fantastic perfume!  

Recommend? I would recommend this to someone who is looking for a sophisticated floral/sweet scent that you are able to wear everyday. 

XOXO 
Angela


Tuesday, February 3, 2015

Eucalyptus Tea Scrub Review

Hey guys! Happy February! The year is just flying by! 
I am here with another review for you! This one is on the stress relief eucalyptus tea sugar scrub from Bath and Body Works! (That is one long name!) I got it for $8 when they had a weekend sale. Normally they are $16! 

Here we go, to the review! Let's talk about smell first. It smells so lovely, however, it is a very potent scent. I think that it smells like a fresh hot cup of green tea with some hints of floral and musk. Before using this, make sure you mix it up or shake it up so that the sugar and essential oils blend together. Since it  oil, this scrub is great at moisturizing and exfoliating at the same time. The sugar is quite chunky so it does feel a little bit harsh, personally I love it. After a long day I think that this the perfect scent to wine down to. The one downfall is that it does make your shower/tub floor pretty slippery! Be careful!   

Recommend? I would most definitely recommend this to any ladies out there looking for a sugar scrub that is moisturizing, exfoliating, and great smelling! 

XOXO 
Angela